Tag Archives: Tutorial

Daily Makeup Routine

I know that every time I have an outfit post I list my makeup. I also realize that what I’m wearing rarely changes, so I thought I’d show you what my typical daily makeup looks like.

fashionandhappythings-0603

I don’t lay my makeup out like this when I go to put it on, I just wanted to make it look pretty for blog  purposes. And yes that is a GlossyBox lid.

Benefit’s Girl Meets Pearl is one of my favorite highlighters, and it’s absolutely perfect for daily use. Since I have a yellow undertone to my skin, I like that this is pink toned because I feel like it adds a bit of a warmth to the glow it gives.

This is probably one of my all time favorite concealers. Nars Radiant Creamy concealer is hands down the best concealer for dark circles I’ve ever used. It’s okay for acne blemishes, but it’s not as good as the Tarte Amazonian Clay Concealer. I’m out of that one right now and since even though it’s not the best, the Nars does work I’m not worrying about repurchasing the Tarte one right now.

My Foundation is most days is the Rimmel Stay Matte Liquid Mousse, usually I prefer the Nars Sheer Glow or the Chanel Vita Lumiere Aqua, but lately I’ve been using the Rimmel Foundation on days where I’m not taking photos or filming. It’s a really good slap it on and go product for me.

The Mascara pictured is the Rimmel Glam Retro something or other. I’m not positive because I don’t use it anymore. I love how it looks, and that it’s a breeze to apply, but it makes my eyes water like crazy. So right now I’m currently using the YSL Babydoll that I got a sample of and seems to be lasting for ages. When that runs out I’ll be forced to decide which YSL Mascara to purchase since they’re the only brand that I’ve tried where my eyes don’t water like crazy.

My setting powder which I don’t use with the Nars foundation is the Makeup Forever Professional HD Setting Powder. I love this powder with every other foundation I’ve tried it with, but I don’t like what it does to the Nars foundation.

These are the Lancome Eyeshadows that I use on pretty much a daily bases. I have a NYX palette and a BH cosmetics 120 palette but I just don’t love them as much as I do these. The Lorac Pro Palette is on my Christmas list though.

And the last thing in my daily makeup routine is my blush which is the Nars Deep Throat Blush. It’s terrible but I only own one blush. I went through a big clearing out and use it up phase and somehow got to the point that for awhile I was actually out of blush. It was awful. I’m just so indecisive and rather than buy a few I ended up not buying any for the longest time. It was Maxwell that recommended this blush to me so of course I needed it instantly. I do plan on buying a blush palette soon, but I’m torn between Nars, Sleek and Inglot. I might go with two, but that just seems excessive to me.

There’s no lip product pictured because that changes constantly. Or I’m just not wearing one. Mostly it’s the latter, because I’m terribly forgetful.

If you wanna see me slap all this on then you can watch my Everyday Fall Makeup Routine below

What’s your everyday makeup or do you switch it up everyday?

Hair Tutorial: Twisted

Or You Asked For It.

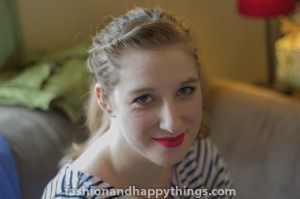
I had a couple requests for a Tutorial on how I did my hair in this post, so here it is!

fashionandhappythings-9927

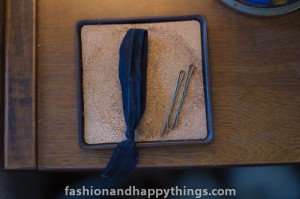
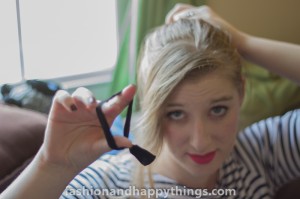
First you’ll need: A Hair Tie (I’m using one from Emi-Jay), 2 bobby pins, and not pictured Hair Spray. Personally I use Aveda’s Air Control:
fashionandhappythings-9896

Starting with your hair down:
fashionandhappythings-9905

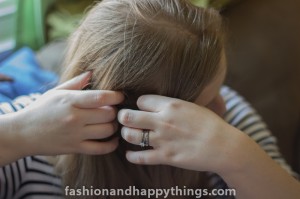
Seperate out a section at the front which will have your bangs if you have any:
fashionandhappythings-9906


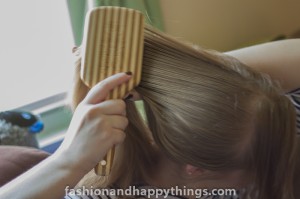
Then brush up into a ponytail:
fashionandhappythings-9907

And tie it off with your hair tie:
fashionandhappythings-9909

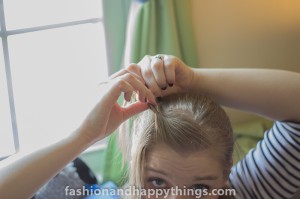
then start twisting up your bangs:
fashionandhappythings-9912

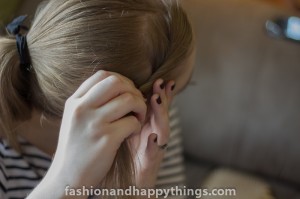
You’ll be placing the bobby pins in two places right before you get to the end of your bangs:
fashionandhappythings-9919

And then again at the end of the length of hair you’ve twisted:
fashionandhappythings-9923

And this is how it should look:
fashionandhappythings-9926

This really is super simple, after it’s all done just spray with a light hold hairspray and smooth any flyaways you may have. You might have to do the twist a few times to get it just how you want it, but it’s so quick and easy that after awhile you’ll have it perfect on the first (or second) try.

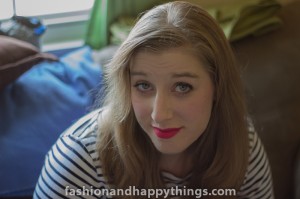
My top is from H&M and if you’re wondering what’s on my face, I’m wearing: Nars Sheer Glow in Siberia, Nars Concealer in Vanilla, Benetint, Lancome Taupe Eyeshadow, Makeup Forever Setting Powder (just where I used the concealer) and Nyx Soft Matte Lip Cream in Amsterdam

If you try out this hairstyle tweet me a picture, I’d love to see it!


DIY Floral Headband or Mistress Mary How Does Your Garden Grow?

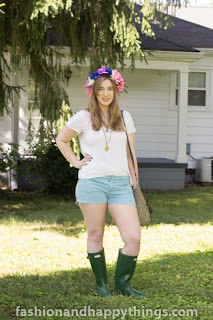
 If you saw my last Stylish Sunday’s Post, Pride Parade or The Heat, then you might recall I had a Fabulous Floral Headpiece on. 

 You might also recall that I said I’d do a DIY post on how to make your self one. So here that post is. There are actually some other tutorials on how to do this if you search the internet, but I tried to make this as uncomplicated as possible.

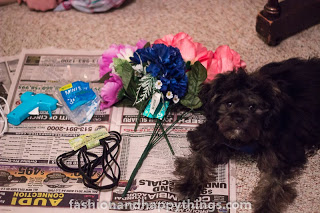
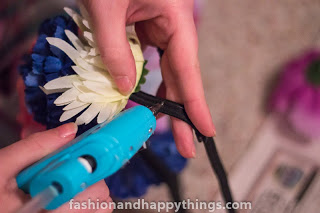
You will need stretchy Headbands, Faux Flowers in different colors and sizes if you wish, a Lo-temp Hot Glue Gun and Glue Gun Sticks. Pictured here is my furry assistant Howl.

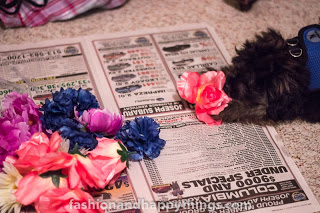
 First thing you’ll need to do is pull all the flower tops off of your flowers. This was Howl’s favorite part.

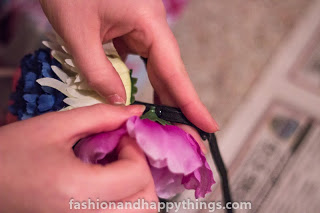
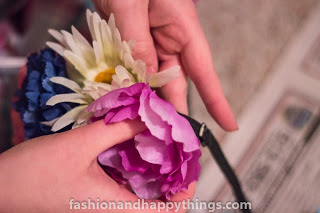
 Then put a dab of hot glue about a on the headband and stick on your first flower. if you’re using large flowers then I recommend putting each dab of Hot Glue about an inch to half inch apart. For smaller flowers then I would play around until you can’t see headband.

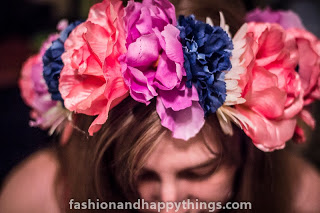
 And here’s the finished result. I’m pretty in love with it, but having made it and worn it for an entire day, I have some bits of extra advice. First make sure your elastic band fits your head well. Mine felt small so I cut two of them apart, measured my head and sewed them together. Secondly, a couple of my flowers fell off because I didn’t use enough hot glue, do not be afraid to really stick them on there with plenty of glue.

I absolutely adored making this and I plan to make another one with some smaller flowers very soon. I’m thinking of maybe using velvet ribbon and some daisies for a very 90′s vibe.

Bonus Note: In some of the above pictures you can see bits of plaid, those are my pajama’s which are from Victoria’s Secret. You guys should know by now I adore VS pj’s, they’re my all time favorite.

Don’t Forget to Follow Me on BlogLovin

Face of the day: Spring Casual

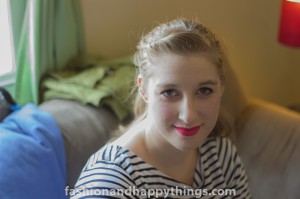
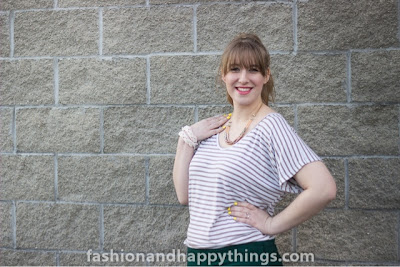
So dear readers, I did promise I’d do a more detailed post on the makeup I was wearing in my last OOTD post. So here it is:

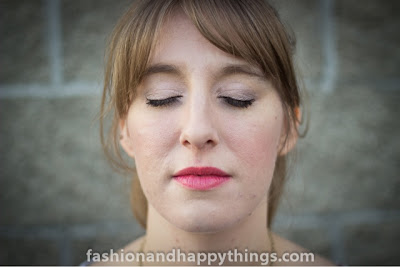
I’m wearing Dr. Jart+ Black Label BB Cream, Urban Decay’s Woodwinked (as blush, I know, I know, I bought a blush finally, you’ll see it tomorrow), and from Too Faced’s Romantic Eye Palette I’m wearing Soulmates, I do, and Un-Veil. My eyeliner is Urban Decay’s Boubon, and my mascara is as always YSL Shocking. On my lips I’m wearing Lancôme Rouge In Love Madame Tulips.Then I set it all with Urban Decay’s All Nighter.

Please excuse my creased eyeshadow, these pictures were taken at the end of the day and I have wrinkly eyelids.
I really liked this look with this outfit, but I wasn’t completely in love with my eyeshadow. I used the little suggestion card that comes with the Romantic Eye Palette, and I don’t think it worked to well with my eye shape. I’m also pretty happy that I finally got to use Woodwinked for something, because it was given to me by the Cosmetic Girl in a contest/swap thing a while ago, and I’ve never been brave enough to use it as eyeshadow.